
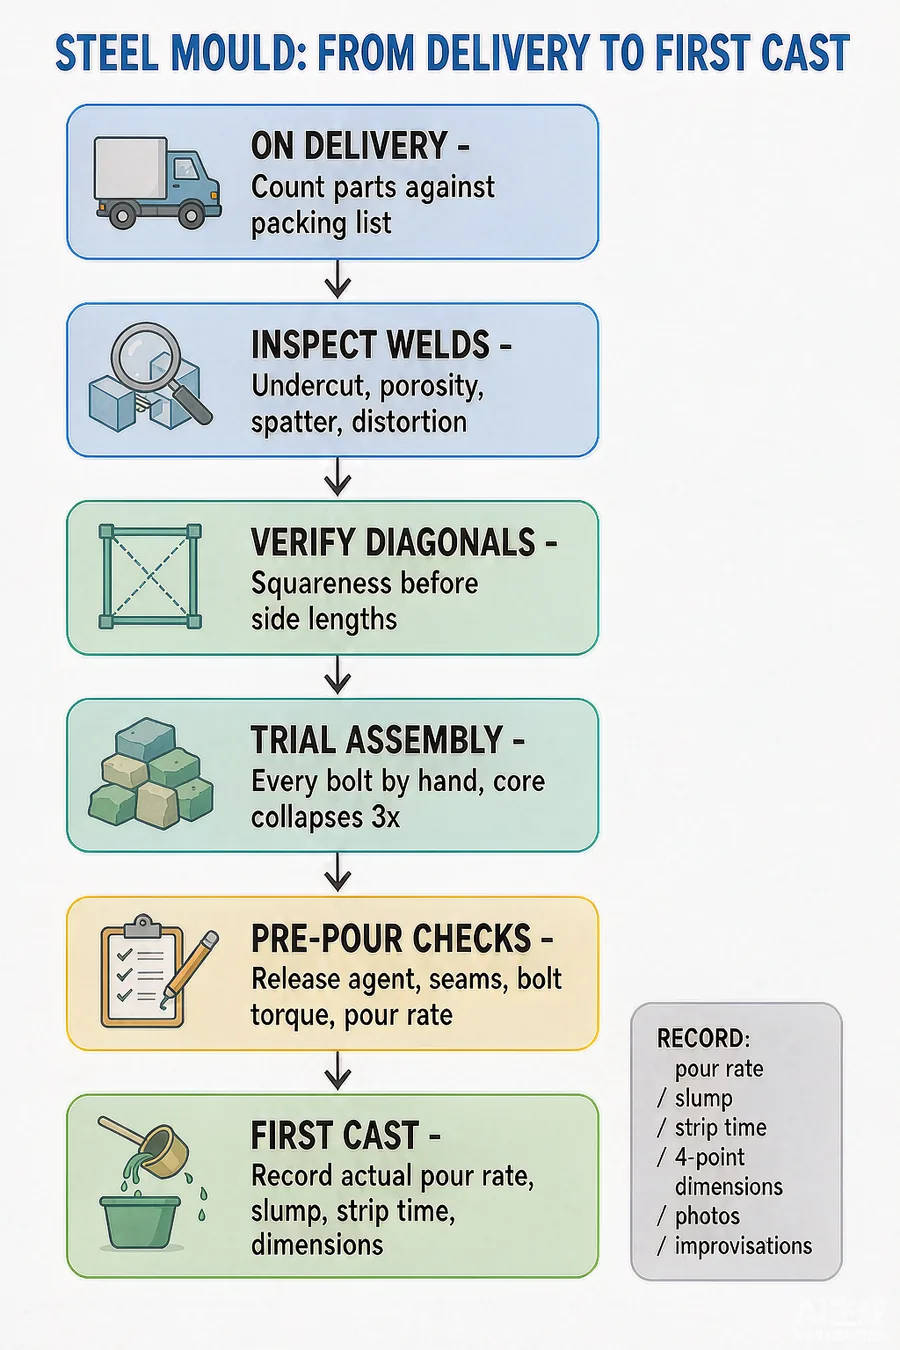
A new steel mould either becomes a production asset for a hundred casts, or a source of rework for the first twenty. The difference is almost entirely decided in the two weeks after delivery, before any concrete is placed. Here is the sequence we recommend to customers.

On delivery: four checks before signing
Do these while the carrier is still on site. If something is wrong, it is far easier to resolve before the mould is moved into the yard.
1. Count and match against the packing list
Moulds ship partly disassembled. Panels, cores, hoops, bolts, lifting lugs and any loose stiffeners should all be listed. Count them. Shortages discovered a month later are usually impossible to attribute, and you pay for the replacement parts and the air freight.
2. Look at every weld
You are not doing a weld inspection — you are looking for the four defects that indicate a rushed workshop:
- Undercut along the rib-to-panel joins. A groove melted into the panel edge reduces the panel thickness exactly where the bending stress is highest.
- Porosity and pinholes on any weld that will contact concrete. These become permanent marks on every unit you cast. They are cheap to fix now, impossible later.
- Weld spatter left on the inside face of panels. Scrape it off with a chipping hammer before the first cast; do not grind into the panel.
- Distortion. Sight along each panel edge against a straight edge. A panel that has pulled out of flatness during welding will telegraph a wave into the concrete face. Allow up to 2 mm over 2 m; beyond that, reject the panel.
3. Verify dimensions, squareness first
Measure the diagonals before you measure the sides. A mould with correct side dimensions but different diagonals will produce units that do not stack, and stacking is what most culvert and channel specifications actually care about. Typical acceptance: diagonals equal within 4 mm on a 3 m box, sides within ±3 mm.
4. Check the lifting points are welded to structure, not to skin
A lifting lug welded only to the panel skin will tear out. It must be welded to a rib or to the frame. This is the single most dangerous defect on a delivered mould, and it takes ten seconds to check.
Trial assembly: do it once, dry
Assemble the complete mould on flat ground before the first cast, and:
- Check every bolt goes in by hand. If a bolt needs force, the holes are misaligned. Chase them now, not at 5 am on pour day.
- Confirm the core collapses and re-erects freely. Do this three times. Mechanisms that are stiff when clean will seize when coated in release agent and concrete dust.
- Check the assembled internal dimensions again, with the mould fully bolted as it will be in service. Clamping loads move panels; a mould measured loose may not close to the right size.
- Mark and record the position of every shim, spacer and adjustment. Photograph the assembled mould. On the second and third setup these photographs save an hour each time.
Before the first cast
| Item | Check | Why it matters |
|---|---|---|
| Release agent | Applied thinly and evenly, wiped to a film — not left wet | Over-application is the most common cause of a pitted first-cast surface |
| Seams and joints | Every panel joint sealed with the specified gasket or tape | A 1 mm gap produces visible grout loss and a fin that needs grinding on every unit |
| Bolts | Torqued to spec, in the sequence given in the manual | Uneven torque bows panels and throws dimensions out over the length |
| Core position | Spacers in place, core verified centred at both ends | Wall thickness variation is invisible until the unit is stripped |
| Pour rate | Agreed with the batching plant and written on the pour card | The rated rate is a structural limit, not a suggestion. A pump truck left uncontrolled will exceed it |
| Vibration plan | Poker size chosen, insertion points marked, duration limited | Over-vibration causes segregation and panel wear; under-vibration leaves honeycomb |
| Trial unit | Cast one unit and inspect before committing to full production | It is the cheapest possible way to find every remaining problem |
What to record on the first cast
Write these down. They become the baseline against which every later problem is diagnosed:
- Actual pour rate achieved, in metres per hour, not the planned figure.
- Concrete slump and temperature on arrival.
- Time from pour start to stripping, and the ambient temperature.
- Panel temperatures if the day was hot or cold.
- Every dimension of the stripped unit, at four points, not one.
- Photographs of the unit, of the stripped mould, and of any defect.
- Anything that required improvisation — a missing bolt, a shim added, a clamp repositioned.
The improvisations matter most. If the first cast needed a shim in one corner, that shim will be needed on every cast, and it should be made permanent rather than rediscovered each time.
First-cast defects and what they indicate
- Fin lines along every panel joint — insufficient clamping or a gasket that is too thin. Not a mould defect; a setup issue. Fix before cast two.
- Bowing in the middle of a long panel face — pour rate exceeded, or rib spacing wider than the design assumed. Slow the pour and check the pour rate calculation against the drawing.
- Blowholes across the whole face — release agent applied too heavily, or the mix is too stiff. Both fixable.
- Concrete bleeding at the base — mould not seated and sealed on the casting bed. A visible grout line at the bottom of every unit means the bed needs levelling, not the mould.
- One corner consistently oversize — the mould has been assembled out of square. Recheck diagonals in the assembled state.
The purpose of the first cast is not to produce a sellable unit. It is to convert the manufacturer's drawings into your own instructions. Budget the time for it — a first cast treated as a rushed job to fill a delivery gap is how recurring rework starts.